We have already covered the history and changes to the 911 Cylinder Head Stud. You can read all about the 911 head stud. Today we are going to show you the way we set the studs in our 1969 911T Magnesium case build.
Setting Cylinder Head Stud Height
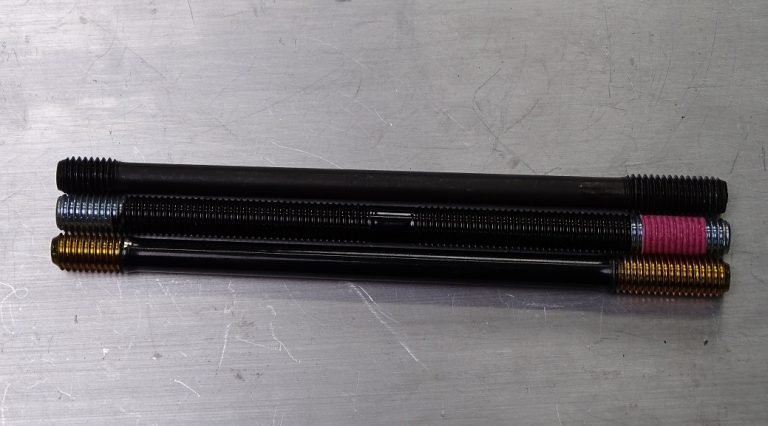
The cylinder head studs need to be set to the same height. Any differences in height could affect the cylinder heads and the cam box. It is a simple process to set them correctly.
The cylinder head stud holes in the case have been Time-Serted in this engine. We have done the update to the magnesium case before we started this build. If you have not done this and you are ready to put in your studs, you have a dilemma. The case threads are the weak point of the engine. You can attempt to do them with the engine partially assembled, but you may have a hard time keeping everything straight.
The best time is to do all the machine-work first.
You will Need
Table could not be displayed.You can check the threads first if you like, you should be able to do up the head stud by hand. Inspect all the threads to make sure they are clean. If any of the threads are tight, check for cleanliness again, if they are still are too tight you can run an M10 tap down the thread. Clean again, making sure no debris gets into the case. And if you have to use tools to tighten the stud, use the two nut method.
Take a stud and apply Loctite 270 to the longer threaded portion of the cylinder head stud. Insert the head stud and tighten it down until it is 135mm from the case to the top of the installed stud. We use our depth gauge to measure the height and to stay consistent.

Up next in you Air-Cooled Engine Build
Up next we put the cylinder head studs to use by moving on to the pistons and cylinders, heads, and cam box. We have already covered how to measure your old pistons and cylinders. If you missed that, please check out, Pistons, and Cylinders. We are using new pistons and cylinders on this engine, and we show you how to set your piston rings in the next lesson.
The heads for this engine have already been refurbished. To cover the heads, we have an eight-part series on the cylinder heads. Watch that series on Youtube
We have also prepared the cam boxes, by cleaning and measuring them. The cam box, and how to refurbish/measure it is also available. Cam box article.
All of this work has been done before the case was closed. Building an engine is smooth when you have all your ducks in a row, so to speak. Problems arise when you jump around, don’t measure or order your parts, and end up going backwards to move forward.

4 thoughts on “How to Set Cylinder Head Studs in your Air-Cooled Porsche Engine.”
Hi. I have a question about damaged headstud hole threads on an aluminum case. 3 of them. What would be the proper technique to repair these. Would it be the same as a magnesium case? I can not seem to find the answer anywhere. Thank you for your time
Gerhard,
Yes, you would drill out the damaged thread and install a Time-sert insert to restore the thread.
Kurt
Thank you!
Your welcome and good luck with your repair…
Comments are closed.