
We show you how to cut the three-angled seat in your cylinder head. The work that you did to the valves in lesson 2 comes into play in this lesson. By cutting the valve seat, we will match the valve face and create a good seal between the two. A good seal is essential for combustion.
Cutting Valve Seats
The valve seats are what the valve will seal against in the cylinder head. Before cutting the valve seat you should always measure the installed height of the valve. To measure this, install a new valve and measure from the back of the valve to the cylinder head. The installed height of the valve should be 47.50 mm +/- 0.60 mm. If the valve stem is close to or exceeds the installed height tolerance, then the valve seat will need to be replaced.

Seat Angles
The valve seats are cut with three different angles. The basic angles are 30°, 45° and 60° to 75°. You can also use an optional 15°-degree angle to close the valve seat before cutting. When re-cutting the valve seats, cut them in this order.
1. 30° angle should be cut first. This lowers the valve seat.
2. 60° to 75° throating or exit angle
3. 45° Seat angle last
Making the Cuts
Step one is to apply a coat of Dychem ink to the surface. This will make it easier to see the seat angles. Then cut the first two angles of the valve seat. Next, reapply a coat of Dychem and cut the seat angle.
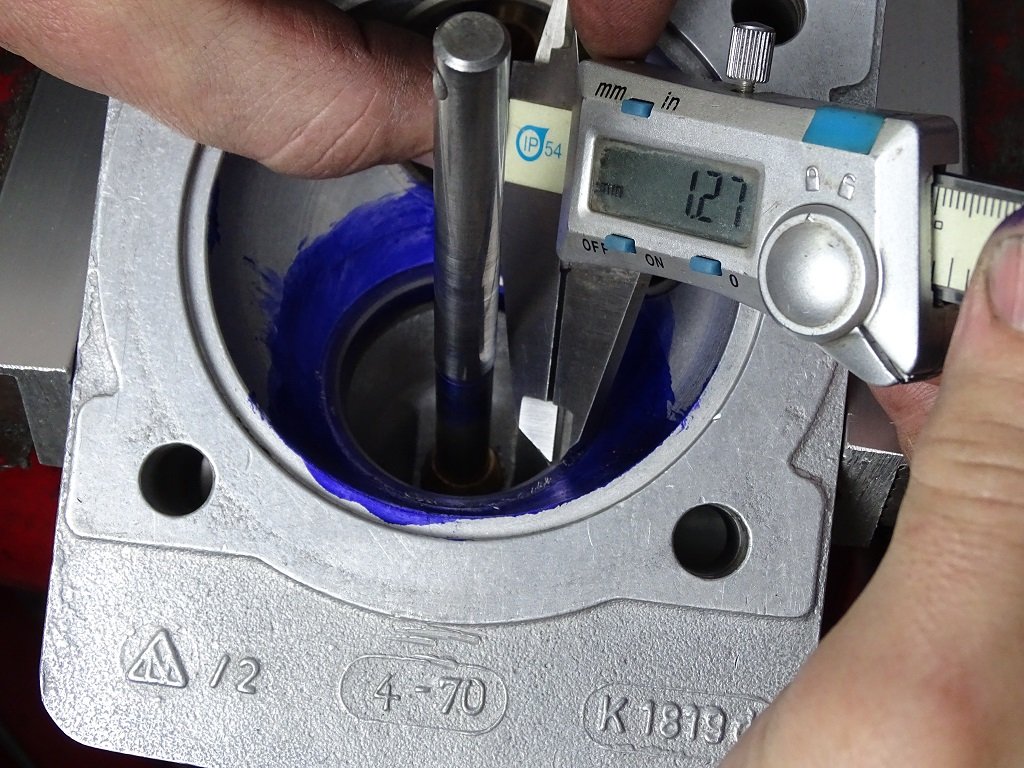
The valve seat angle, (45°) must be a certain width depending on the valve. The intake valve seat width should be 1.25 mm +/- 0.10 mm and the exhaust seats 1.55 mm +/- 0.10 mm for up to 1971 2.2L engines. In the 2.4L and 2.7 L engines, the valve seat widths were changed. The seat width is 1.50 mm +/- 0.10 mm for both intake and exhaust valves.
Valve Seat Position
After cutting the valve seats you will need to check the position of the seat on the valve face. To do this lightly coat the valve face with Prussian blue marking ink. Then install and seat the valve into the cylinder head. Do not rotate the valve as we will be checking the seat seal as well as its placement.
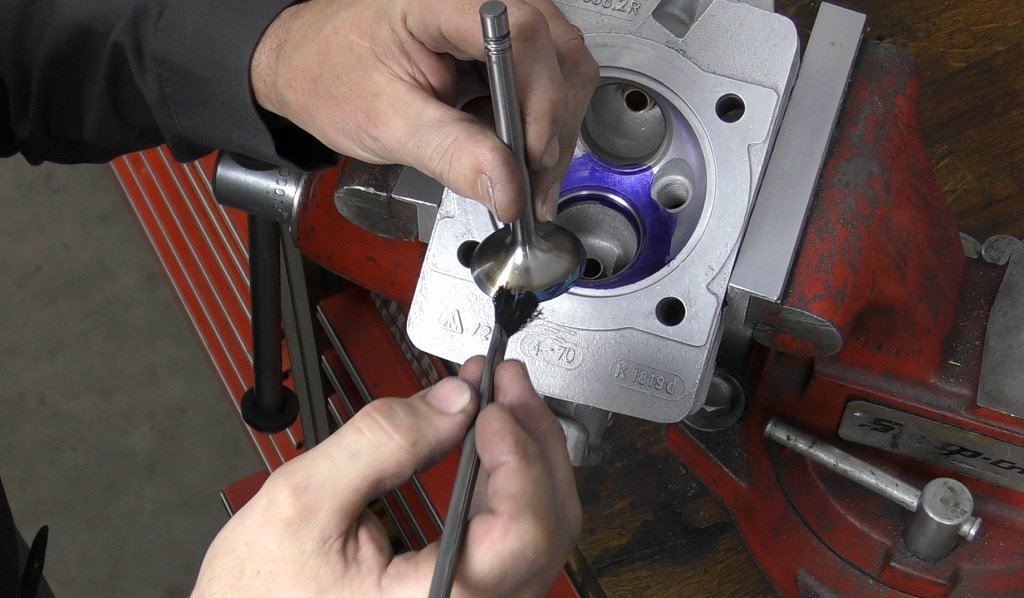
The seat mark on the valve should be consistent all the way around the valve face and there should be a nice clean ink transfer to the entire valve seat. The contact point should be located in the center of the valve face. If the contact point needs to be moved up or down on the valve face you would do the following.
For a seat contact that is too close to the margin:
Recut the 30° angle to lower the valve seat then cut the 45° angle to the specified size and recheck the contact print
For a seat contact that is too close to the top of the valve face:
Recut the throating angle, (60°-75°), then recut the 45° seat angle to the correct width and then recheck the contact print.
Lastly, after the seat has been cut, re-check the valve installed height to verify that it is still within specifications of 47.50 mm +/- 0.60 mm

Conclusions on Cutting Valve Seats
Many times we have said your heads may have been worked on before you got the car. The seats can only be re-cut so many times before the valve stem height is out of specifications. When the valve is too deep into the head, it is time to replace the seat. New seats are uncut and have a square profile. In lesson 6 we show you how to remove old seats and install new seats. The angle cutting is the same as this lesson after the new seats are in, so you will be back here again!
