
Parts cleaning is one of those jobs that I believe is greatly overlooked by repair shops and individuals alike. Parts cleaning is also the one of the single most important part of any job. The amount of time required to thoroughly clean parts is also greatly underestimated.
The Home Garage
A lot of the time the parts cleaning side of the job is just not good enough when being done in the home garage. This is because the equipment needed to really clean a part is expensive and takes up a lot of space. Though a simple tabletop solvent tank can get you by on small service jobs. It is just not enough when performing a major or even a minor overhaul. Even most repair shops will suffer in this area.

Knowing whether or not a part can be reused will depend on its actual condition. The only way to tell if a part will be re-usable is to completely inspect it for damage. Trying to inspect a part that still has dirt and grease on it will just result in a poor inspection. It can also cause an issue installing a part that is not clean and contaminates the rest of the job.
The Cleaning Process Starts
The cleaning process for me starts at the disassembly phase. As I am removing items and assemblies, I will tend to pull gaskets, seals and other items that I can before dropping the part into the cleaner. I also want to eliminate a part that is obviously not savable. This is so I am not wasting time on a worn out part.
First Stage of cleaning
The first major stage of the cleaning process is the parts washer. The purpose of this is to remove as much of the grease, oil, and debris from the part as possible. After this has been done the initial inspection process can begin. This is usually just a quick look over for obvious signs of damage that will stop the part being re-used. After the basic clean the item can move on to more aggressive types of cleaning.

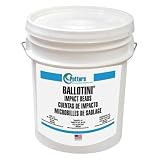
We use an organic oil eating microbe cleaner. This is good because it is water based and converts the oil. We have found the cleaning to be better than we thought it would be, and have stuck with the cleaner for years now.
The downside is the cost, the fluid needs to be heated and there is quite a lot of evaporation. The filter mats are great, you can take off the layers as you gross them up. Also, you do not need to change them with every fluid top-up, maybe every second top-up.
Second Stage
The next step for our shop is the vapor blast machine. Before any type of media blasting can be done the item needs to be completely disassembled and free of any oil. If an assembly is blasted when still together often media will become lodged in unseen areas. It can also result in a part seizing up resulting in damage when it is either further disassembled or put back into service.
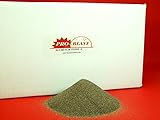
When media blasting parts it is important to be careful what type and grades of media are being used. Because the parts we work with are primarily aluminum and magnesium we use a glass bead/aluminum oxide mix. This is slower to clean heavy carbon deposits but also won’t damage the part being cleaned. If a media designed for cleaning cast iron is used like straight aluminum oxide it can cause damage to the part being cleaned.

Third Stage
The next stage for us is to move the part into the ceramic polisher. What this does is seal the pores of the aluminum or magnesium. When a part is media blasted the surface is hit with whatever media is being used. This will result in a dull looking finish and a rough texture. This is because the surface of the part now has a large amount of little mini craters where the media hit. If left these little craters will hold dirt and grease allowing the part to become dirty again very quickly.
Putting the part into a media tumbler and running it for about 20 minutes smooths out all the craters created by the blasting process. It will also produce a slight shine on the part making it look new again. It will also help the part resist oil and grease soaking into the part. As the part is being tumbled it is also being flooded with soapy water. The water will aid in washing out any remaining blast media from the part.

Once the part has been removed from the tumbler it is rinsed with clean hot water. Any passageways or tight areas on the part need to be inspected for remnants of blasting media or ceramic material. If any of the cleaning materials are left behind, they can cause any early system failure. This will also mean that any galley plugs in the part will need to be removed so that a physical brush can be pushed through the passageway.
Inspection and Damage Repair
Now the part can be inspected properly for any signs of damage or wear. After the part passes the visual inspection, I can begin the machine processes. I consider many of these processes to be part of the cleaning process, especially cleaning and deburring bolt holes. One of the biggest issues with an old aluminum or magnesium parts is that they have seen a lot of mechanics. Often these mechanics have over tightened mounting bolts and other hardware.

This causes bolt holes to become distorted and they can close in on themselves. If left this can make reassembly difficult and compromise bolt torques due to excess resistance to the fastener. To fix this I will usually run a ream down the hole to restore it to the correct size. Then next deburr the edge of the hole using a counter bore tool.by doing all of these processes will ensure that the part will go back into service without any issues.
Gasket Surfaces
The other common issue is surface warpage on gasket surfaces. To make sure that the part can be reinstalled and not leak oil, fuel or coolant the gasket surfaces need to made flat again. This can be done by either machining or sanding the part until flat.
Depending on what the part is it will most likely be washed multiple times before it is actually ready for re-assembly. Especially a part like a cylinder head that will go through multiple stages of machine work before it is complete. At each stage, the part will be washed off to remove cutting oils and machining chips.

Equipment and Processes
Good cleaning equipment will make a large difference in the amount of time required to clean a part. It will also have a direct effect on the finished product. The other part of the picture is the process and cleaning agents used. We have developed our cleaning methods based on years of experimentation with different soaps, medias, and processes.
Parts washers
The shop parts washer has evolved in the last 30 years that I have been in the business. It used to be that chemical cleaner in the back of the shop that used a highly flammable mixture of cleaning agents. You used to have a lid on it for two reasons, one to help with evaporation and also to stop it catching fire from a stray spark from elsewhere in the shop. Nowadays those are pretty much a thing of the past, as most cities and states have banned the use of those types of cleaners.
Now all of the parts washers are water based. There are lot of different types and brands and all have their own advantages and draw backs. There are cabinet styles that work like a dish washer, ultra-sonic baths that allow you to submerse a part in a cleaning solution and it is bombarded with ultra-sonic waves and the traditional stand up parts washing tank. All of these types of cleaners use a water based cleaning solvent.

All of the above cleaners have their own separate advantages and disadvantages. The automatic type machines are good because you don’t have to stand there the whole time, but are expensive to buy, maintain and take up a lot of space. The traditional style parts cleaning tanks are less expensive and smaller but are more labor intensive to use.
Mechanical Cleaning Methods
Using items like bench top wire brushes, air powered scrapers, and air powered scotch brite discs to clean parts needs to be done carefully. Through all of these methods can speed up the process they can also result in damage. Air powered scrapers and scotch brite cleaners are great for removing stubborn gaskets and excess sealants but they can also remove the base material as well. Bench top wire brushes are great for cleaning bolt and stud threads, but they will also remove the protective zinc plating from these parts as well.
I have seen so many parts that were savable before being subjected to some of these types of cleaning methods. However, the aggressive nature of the cleaning process caused gasket surfaces to become distorted or damaged beyond repair.
Media Blasting Cabinets
Sand blasters or media blasters come in a lot of different sizes and brands. All of them do the same thing, in that they use air from a compressor to propel an abrasive media at the part. A vapor blast machine like we have does the same thing only that the media is suspended in water. This results in a better finish on the part and no dust but is expensive to purchase.

When using a media blaster, it all comes down to the type of media that you use. After years of blasting parts I have my own mix that I make using glass beads and aluminum oxide. The media is a comprise of cleaning ability and surface finish. Bead blast media also has a service life. It will break down over time and can become contaminated with debris and dirt from the parts you clean. This means changing it on a regular basis.
Media Blasting Misconceptions
There is also a certain amount of sigma behind media blasting. Many people believe that by blasting a part you will contaminate the assembly that it is to be installed into. You will hear of people using Soda as a media. Then claim it is Ok because the soda is water soluble. So when the part is washed any remaining media will dissolve.
Though it can happen it all comes down to the process. If you blast an assembly without disassembling it then odds are you will have contamination. If you don’t follow through cleaning after the media blasting, then the odds are you will have contamination. Using fine Soda as a blasting media is not really practical as the media is just to fine and breaks down too quickly. Any time savings you may gain from the after cleaning process are lost to increased blasting time and decreased media life.
Ceramic Polishers
Ceramic polishers are rarely found in general repair shops. They are a lot more common in a machine shop. Though in my opinion any shop that process parts needs to have one of these. These machines come in all different sizes and shapes, from small bench top units to large floor models that can take an entire engine case. Using one of these machines as the final step before machining is really the key to getting the part back to a factory type of clean.

Just like media blasters, polishers have a large choice of media’s and soaps available to use. Using the wrong one can result in damage to the part. This is something again where we have developed our own media and soap combination to produce the best results possible.
Do it right
What ever it is you are working on having cleaned and refurbished parts is always going to a part of the job. If you don’t have access to the equipment required to properly clean and process the part, you will need to find sub-contractors that preform these services for you. Most of all cleaning takes time, often more time than you want. However, if you put the time in, and use the correct methods and processes the end product will be a success.

3 thoughts on “The Parts Cleaning Process”
Great article!! T..
Now I see this! After asking the question on Youtube. Thanks for replying over there and publishing the details. here.
your Welcome Scott
Comments are closed.