
Rebuilding a Weber 40 IDTP three-barrel carburetor.
In our last lesson, we completely cleaned out the carburetor and sent it out for coloration. Now that this set is back, we can start with more cleaning! Cleaning really is the most important part of any carburetor restoration. Get ready for gallery plugs to throttle plates!
Before we put back the gallery plugs that we removed, we must test the passageways. In this case, a passageway was blocked.
Reusing parts
In our cleaning lesson, we measured and inspected the parts. You should have all your new parts together. We always replace throttle plates and on this set, all the brass jets, and the throttle shafts. The accelerator pump levers are another area of great wear. Replacing these parts is a normal part of a full restoration on the Weber Carburetor. Re-using parts is only ok if they are not worn out.
Throttle Shaft Arms
The ball ends can become worn over time and replacing just the ball is a good start for crisp acceleration Peening in the balls is a tedious job, but take your time and get them nice, tight, and straight.
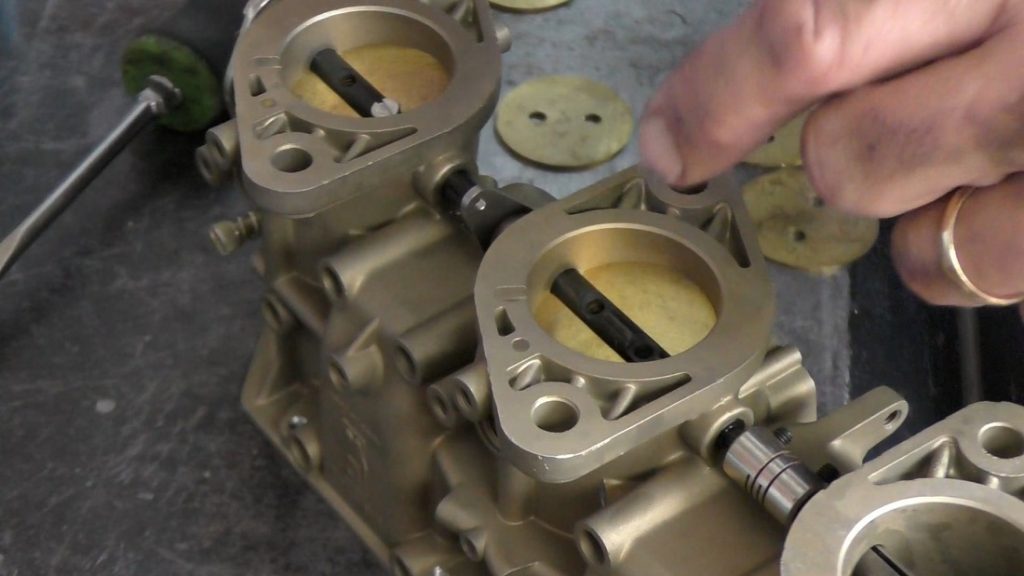
Machine work and final cleaning
This is the time to re-test all of the fuel passageways. Weber carburetors have a tendency to not perform well because of blocked passageways. We use a 1.75mm drill bit to unblock the fuel passage. Before any parts go into the freshly colored carburetors, it is time to do all of the dirty work.
Metric taps and drill


We re-tap all of the threads, just to be sure. At the top, it takes an M5 x .8 thread tap. And on the pump face an M4 x .8 bottoming tap. The bowl plugs are an M7x 1 thread.
Final clean and we are ready to put parts back in!
Gallery Plugs
The plugs are a number 4 lead shot ball. The shot ball needs to be flattened before dropping into the carburetor body. Use a hammer and punch to expand the lead plugs. Test the circuit to be sure of your seal before moving on.
Lead shot, share with your freinds
Table could not be displayed.Throttle shafts and throttle plates.
Throttle shafts
Put the throttle arms onto the throttle shafts. The Teflon needs to be worked into place and trimmed as need be. We use Lanox Lubricant because it is a very light lube. We do not use WD40 or any greases. Throttle return springs come in left and right, it is a juggling act to get all the parts together at the same time. Work the Teflon bushings on the short shaft side. Tighten the arm to the shaft but leave the couplings loose to install the new throttle plates.
Throttle plates
Throttle plates have a top and a bottom, you will need to look closely to see how the edge lines up with the bore. If you drop a throttle plate you can very easily damage this edge, and you will need to replace that plate.
Work with each throttle plate, leaving the screws loose until the plate centers in the bore. This will take some time, you are not looking for an air tight seal, just an even gap. Use a flashlight to see how even your gap is.
Put all the screws in without any loctite, then once all the plates are set, remove one screw at a time. Red loctite works well for us and we trust in its use on throttle plate screws.
We use Lanox and Loctite


The coupling between the shafts is nipped on one side, with two set screws facing down and two facing out. We will be matching airflow on the engine, but we do set a base idle position first. Open the plates until you see a progression port, this is the setting for an IDTP carburetor. For an IDA you would just cover the progression port for a base set.
Next Lesson on your Weber 40 IDTP Carburetor
This lesson took you from an empty carburetor to having the gallery plugs to throttle plates installed. In our next lesson, we move to the accelerator pump circuit. This has to be set up so that we can drill the throttle shaft lever into place.
