
Piston designs in magnesium case engines
In this lesson, we are measuring the pistons, but the magnesium case engines use several different designs of pistons and cylinders. The early 2.0L engines use either a Cast Iron or Biral cylinder. The Biral cylinders have a Cast iron insert with Aluminum fins on the outside of the cylinder. The 2.0L engines also use composite head gasket versus the 2.2L, 2.4L, and 2.7L engines that use a CE Ring.
The piston dome design will also differ between engines. The early 2.0L engines have a large dome on the piston with large valve pocket reliefs. The 2.2L and 2.4L have a much smaller dome on the piston and use smaller valve pocket reliefs. The 2.7L pistons use an offset dome design and are also known as CIS pistons.
Cylinders or Barrels
We will have a separate video lesson and write up on the cylinder inspection and measurement. In this lesson on measuring the piston, we need to look at the different types of barrels.
Remember, if you are planning on using the piston, barrels, and wrist pins again, keep all these parts together for each cylinder. They have worn together in running and must stay together. If you go with new parts they also need to keep together as well.

The barrels used in the 2.2L and 2.4L can also be either Cast Iron or the Biral design. For the most part, the 911T engines will use the straight cast-iron cylinders and the 911E and 911S models use the Biral design cylinders.
The 2.7L cylinders are straight Aluminum with a Nikasil coating on the bore surface to help protect it from wear. These cylinders are very light in weight and have a good strong wear surface. The cylinders are also limited in how we can do service work on them. If the cylinder is damaged it will need to be sent to a specialist that can overbore and reapply the Nikasil coating. Usually, we are just replacing damaged Nikasil pistons and cylinders.
Note: Most of the new replacement piston and cylinders coming from Mahle for the 2.0L, 2.2L, and 2.4L engines are now also Nikasil type cylinders. So, use caution when inspecting and servicing these engines.
Piston Inspection, Visual
The pistons need to be cleaned enough so that we can perform a quick visual inspection. The purpose of this inspection is just to see if further cleaning is even warranted. A piston that is displaying obvious signs of damage, it does not need to be cleaned any further. If no obvious signs of damage are present, you will need to continue cleaning so that actual measurements can be taken.
Measuring the piston
After a piston has passed the initial inspection it will need to be cleaned completely so that it may be accurately measured. First the correct specifications will need to be looked up for the piston that you are about to measure.
Understanding the piston markings
Start with the year and model of the engine being worked on. Next with the piston cleaned up the piston size and new install tolerance should be visible. These numbers are stamped on the top of the piston.

Use these numbers to compare to the factory information to verify the actual piston installed in the engine. Remember that these engines can range from 40 to 55 years old. It is highly likely that the pistons and cylinders could have been replaced with something different.

Once you have identified the piston specifications mark the measurement height on the piston skirt. Using a micrometer measure the diameter of the piston. Pistons that are less than 0.10 mm of their original size are no longer usable and will need to be replaced.
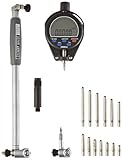
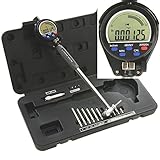
Table could not be displayed.Measuring the piston ring groove
If the piston diameter is still within usable specifications, then the next inspection point will be the piston ring grooves and lands. Perform a visual inspection of the grooves and lands first. The grooves will need to be clean and free of carbon to be measured. If the piston passes the visual inspection, measure the ring groove clearance. To do this using a new piston ring install the ring into the groove and measure the side clearance using a feeler gauge.

If any of the groove to ring clearances exceed the factory maximum specification, then the piston is no longer usable.
Measuring the piston wrist pin and wrist pin bore
The last point to measure on the piston is the wrist pin and the wrist pin bore. The clearance between the wrist pin and the piston is very tight. No physical movement other than sliding in and out should be felt.
The wrist pin can also be measured using a micrometer. And the piston bore measured using a pin gauge. The clearance can be calculated by subtracting the bore size from the pin size.


Please note that piston pins are matched to the pistons and pins should not be swapped between pistons. If the clearance exceeds the factory tolerance, then the piston will need to be replaced.
After Measuring the piston
After you have passed your pistons it is time to take a closer look at your barrels. We touched on the different types here. One of the most important parts of a good build is having the same height group on your barrels.
Cleaning, inspection, and, measurement are the first steps in your Porsche air-cooled engine build. Do not skip this step! Check out how to calculate engine compression, if you have not yet. You need to calculate compression before the engine goes back together.
